
The Ultimate Gutter Guard Installation Guide: Keep Your Gutters Clog-Free
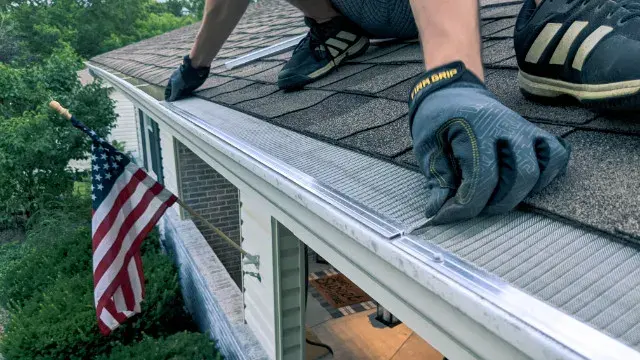
Store shelves are full of gutter guards that promise to end clogs forever. Whether they actually deliver comes down to installation. A guard that is loosely fitted, poorly overlapped or set over a dirty gutter will clog, sag or blow off in the first windy storm. This guide walks through the installation process step by step, so you understand what a quality job looks like whether you tackle it yourself or hire it out.
Step 1: Start With a Clean, Sound Gutter
Every installation begins with a thorough gutter cleaning. Leftover sludge under a guard keeps holding moisture, and anything trapped there is much harder to remove later. Flush each run and test each downspout before going further.
Next, inspect the gutter itself. Tighten or replace loose hangers, reseal leaky seams and confirm the pitch carries water toward the outlets. Guards add a little weight and make the gutter harder to access, so this is the time to fix anything questionable.
Step 2: Measure and Plan
Measure the length of each run and note inside and outside corners, end caps and downspout locations. Check the gutter width, since guards are sized to fit specific profiles. Look at the roof edge too: does it have a drip edge, and how do the shingles sit relative to the gutter? These details determine how the guard will attach.
Pick the right guard for your trees
If white pines are nearby, choose a fine micro-mesh, since needles slip through larger openings. For mostly oak and maple leaves, a sturdy perforated or mesh guard can work. Avoid foam and brush inserts if the goal is a long-term solution.
Step 3: Attach It Correctly
Front edge
Most quality guards fasten to the front lip of the gutter with short screws. This keeps them from lifting in wind and lets them shed debris cleanly.
Back edge
The back of the guard either slides under the first course of shingles or rests on the drip edge, depending on the design and the roofing manufacturer's guidance. Lifting shingles carelessly can break their seal, so this step requires care, especially in cold weather when shingles are brittle.
Overlaps and corners
Panels should overlap in the direction water flows so nothing catches at the seams. Corners need to be trimmed and fitted snugly; gaps at corners are a common entry point for debris.
Step 4: Test and Maintain
After installation, run water across the roof edge with a hose and watch it enter the gutter and exit every downspout. Look for spots where water sheets over the guard or pools on top.
- Check guards after major storms for lifted panels
- Brush off any film of pollen or grit that slows water entry
- Inspect corners and valleys where debris tends to collect
- Schedule a periodic professional inspection and cleaning
Professional Installation Without the Hassle
Installing guards means hours on a ladder at the roof edge, which is why many homeowners prefer to hand it off. Busy Bee's gutter guard installation and gutter cleaning service covers every step in this guide, from cleanout and repairs to fitting and testing. We are fully insured and based in Northborough. Schedule your free estimate and enjoy gutters that stay clear season after season.
Let Busy Bee handle it
Skip the ladder. Get a free, no-obligation estimate from our fully insured team.
Get My Free Estimate